
There are two good ways to make a proper Australian scone: the classic version with cold butter rubbed through flour, and the lemonade version that skips the butter entirely and still turns out just as tall. This post covers both, starting with the classic as the base recipe.
My scones were flat for years until I started keeping butter in the freezer and grating it straight into the flour, thirty seconds of work instead of rubbing in by hand. Cold fat creates the steam pockets that push a scone upward, and it is the single biggest reason most home scones come out flat.
Whether you go classic or lemonade, I will cover the full method, the technique details that actually make the difference, troubleshooting, and how to serve them properly with jam and cream.
Table of Contents
The key ingredients
Self-raising flour
Self-raising flour is the standard choice for this scone recipe. It already contains the right proportion of baking powder for scones without any additional measuring. Sift it before using to aerate it and ensure the leavening is evenly distributed.
Cold butter
Frozen butter grated on a box grater is the easiest way to get cold fat evenly through the flour without any rubbing. If you do not have frozen butter, cut very cold butter into small cubes and work quickly with your fingertips. According to Serious Eats, keeping fat cold in scone and biscuit doughs is the single most important factor for achieving a tall, layered rise in the finished bake.
Full-fat milk
Full-fat milk gives scones a slightly richer crumb than low-fat varieties. Add it gradually and stop as soon as the dough comes together. The exact amount needed varies slightly depending on your flour and humidity.
Two more things matter as much as the ingredients: minimum handling (mix only until the dough comes together, then stop) and placing the cut scones so they just touch each other in the tray, which forces them to rise up instead of spreading out.
Ingredients you will need
Classic scones
- 3 cups self-raising flour, plus extra for dusting
- 1 tablespoon caster sugar
- Pinch of salt
- 60g cold butter, frozen and grated or cut into small cubes
- 1 to 1 1/4 cups full-fat milk, plus extra for brushing
This scone recipe makes 12 scones using a 5cm round cutter.
How to make scones step by step
- Preheat your oven to 220 degrees Celsius fan-forced. Line a baking tray with baking paper.
- Sift the self-raising flour, sugar and salt into a large bowl. Add the cold grated or cubed butter and rub in quickly with your fingertips until the mixture resembles coarse breadcrumbs. Work as fast as you can to keep the butter cold.
- Make a well in the centre and pour in most of the milk. Use a flat-bladed knife or a fork to mix with a cutting motion until the dough just comes together. Add the remaining milk only if there is still dry flour at the bottom of the bowl.
- Turn the dough out onto a lightly floured surface. Pat it out gently with your hands to about 2.5cm thickness. Do not roll it with a rolling pin and do not knead it. Pat and fold once or twice at most.
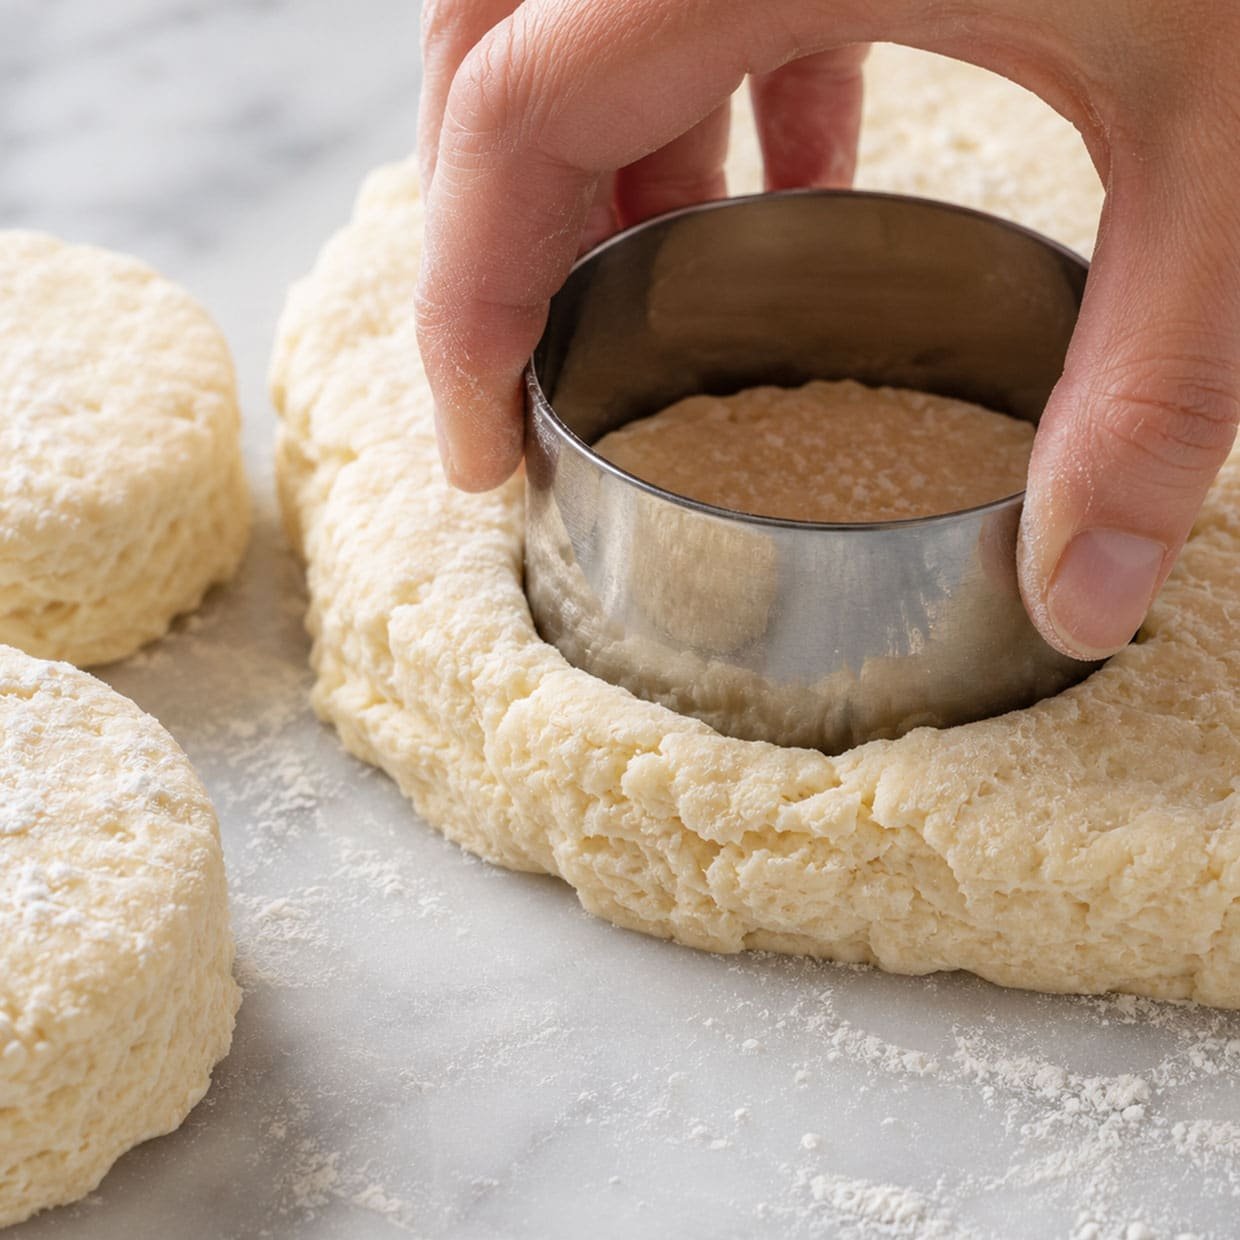
- Cut out scones using a 5cm round cutter, pressing straight down without twisting. Twisting seals the edges and prevents the scone from rising evenly.
- Place the scones on the prepared tray so they are just touching each other. Brush the tops with a little extra milk.
- Bake for 12 to 14 minutes until risen and deep golden on top. Serve warm, split open, with jam and whipped or clotted cream.

Scone Recipe
Course: Sweets, Morning TeaCuisine: AustralianDifficulty: Easy4
servings30
minutes40
minutes300
kcal1
hour10
minutesA classic Australian scone recipe with cold butter, self-raising flour and milk, baked hot and fast until tall and golden. Includes the famous lemonade scones variation made with just three ingredients.
Ingredients
- Classic Scones
3 cups self-raising flour, plus extra for dusting
1 tablespoon caster sugar
Pinch of salt
60 g cold butter, frozen and grated or cut into small cubes
1 to 1 1/4 cups full-fat milk, plus extra for brushing
- Lemonade Scones (variation)
3 cups self-raising flour
1 cup thickened cream
1 cup lemonade (not diet)
Directions
- Preheat oven to 220 degrees Celsius fan-forced. Line a baking tray with baking paper.
- Sift flour, sugar and salt. Add cold butter and rub in quickly until mixture resembles coarse breadcrumbs.
- Add most of the milk and mix with a flat-bladed knife until the dough just comes together. Add remaining milk only if needed.
- Turn out onto a floured surface. Pat gently to 2.5cm thickness. Do not knead or roll.
- Cut with a 5cm round cutter, pressing straight down without twisting.
- Place on tray so scones are just touching. Brush tops with milk.
- Bake 12 to 14 minutes until risen and deep golden. Serve warm with jam and cream.
Notes
- Freeze the butter: Grating frozen butter into the flour is the fastest and most effective way to keep fat cold in a scone recipe. It takes 30 seconds and makes a real difference to the rise.
- Do not twist the cutter: Press straight down and lift straight up. Twisting seals the layers and stops the scone from rising straight.
- Scones touching: Place them so they just touch on the tray. They support each other and rise taller as a result.
- Eat them fresh: Scones are at their absolute best warm from the oven. They are still good the next day but nothing beats them fresh.
Two variations worth trying
Lemonade scones
Lemonade scones are a uniquely Australian shortcut that produces a genuinely excellent scone with almost no technique required. Three ingredients. One bowl. Done.
The carbonation in the lemonade acts as an additional leavening agent and the sugar in it means you do not need to add any separately. The cream replaces the butter entirely, which is why there is no rubbing in step.
- 3 cups self-raising flour
- 1 cup thickened cream
- 1 cup lemonade (not diet)
Combine all three ingredients in a bowl and mix until just combined. Turn out, pat to 2.5cm thickness, cut and bake at 220 degrees for 12 to 14 minutes. That is the entire recipe.
Cheese and chive scones
Leave the sugar out of the classic recipe and add a cup of grated cheese and a teaspoon of dried herbs or mustard powder to the flour mixture. Excellent served warm alongside soup.
Scone troubleshooting
Scones are flat and dense
- Butter was too warm. The fat needs to be cold to create the steam that lifts the scone. Start with frozen butter next time.
- Dough overworked. Mix only until the dough just comes together. Every extra fold or knead makes the scone tougher and flatter.
- Scones placed too far apart. They need to be touching or just barely touching so they support each other and rise upward.
Scones too dry
- Too much flour or overbaked. Check from 12 minutes. The tops should be deep golden but the scones should still feel slightly soft when pressed. They firm up as they cool.
Uneven rise or scones rising at an angle
- Cutter was twisted when cutting. Always press the cutter straight down and lift straight up without any rotation. Twisting compresses and seals the layers on one side, which causes the scone to lean during baking.
Make ahead and storage
Best eaten fresh
Scones are at their peak warm from the oven. If you are making them for a gathering, time the baking so they come out 15 to 20 minutes before you need them. That is the sweet spot between too hot and too cool.
Storing leftovers
Store cooled scones in an airtight container at room temperature for up to 2 days. Warm them in the oven at 160 degrees for 5 minutes before serving. Do not microwave as the texture becomes tough and slightly gummy.
Freezing
Scones freeze well both baked and unbaked. For baked scones, cool completely, wrap individually and freeze for up to 2 months. For unbaked scones, freeze the cut rounds on a tray before transferring to a bag. Bake from frozen at 220 degrees for 16 to 18 minutes.
Recipes you might like
Frequently asked questions
Why are my scones flat?
Flat scones almost always come down to warm butter, overworked dough or scones placed too far apart on the tray. Use cold or frozen butter, mix only until the dough just comes together, and place scones so they are just touching each other before baking. These three changes will fix flat scones in most cases.
What is the difference between classic scones and lemonade scones?
Classic scones use cold butter rubbed into flour, which requires a little technique to get right. Lemonade scones replace the butter with cream and use lemonade as the liquid, which means no rubbing in at all. Both produce a good scone. Lemonade scones are more forgiving for beginners. Classic scones have a slightly more complex flavour.
Can I make this scone recipe without a cutter?
Yes. Pat the dough out to a square and cut into rough squares with a sharp knife instead. Square scones rise just as well as round ones and you waste less dough because there are no offcuts to re-roll.
Should I put jam or cream on a scone first?
This is a genuine debate in Australia and the answer depends entirely on who you ask. In Queensland the cream goes on first, in New South Wales it is traditionally jam first. Ella puts jam first and is not going to apologise for it.
Can I double this scone recipe for a crowd?
Yes, and it doubles cleanly since it is a simple ratio. Work in two batches when rubbing in the butter rather than doubling everything in one bowl, since a larger volume makes it harder to keep the mixture evenly cold and crumbly.
A good scone is one of the most satisfying things to pull out of the oven. Tall, golden, splitting open cleanly down the middle. Once you understand what makes them work, you will never make a flat one again.
Happy cooking from my Newcastle kitchen.
Ella x