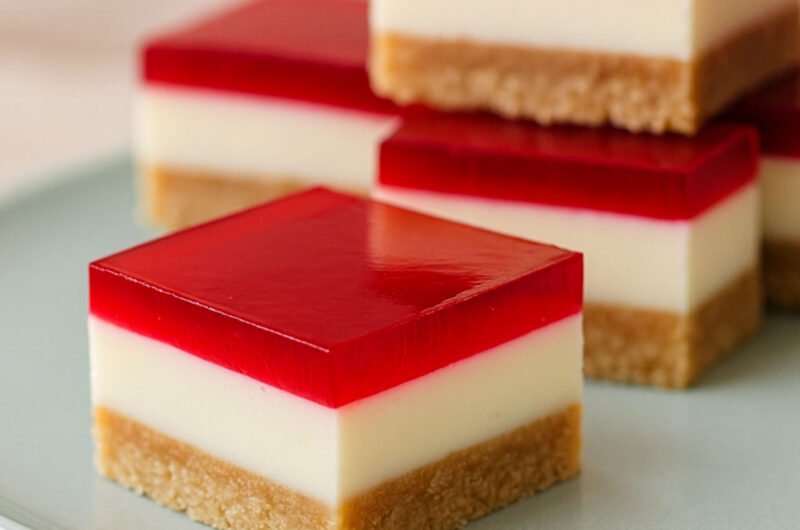
This jelly slice recipe has three layers: a buttery biscuit base, a creamy lemon middle and a bright jelly top. It’s a no-bake slice, so it’s perfect for warm days.
The hardest part is getting clean layers. So let’s start with that.
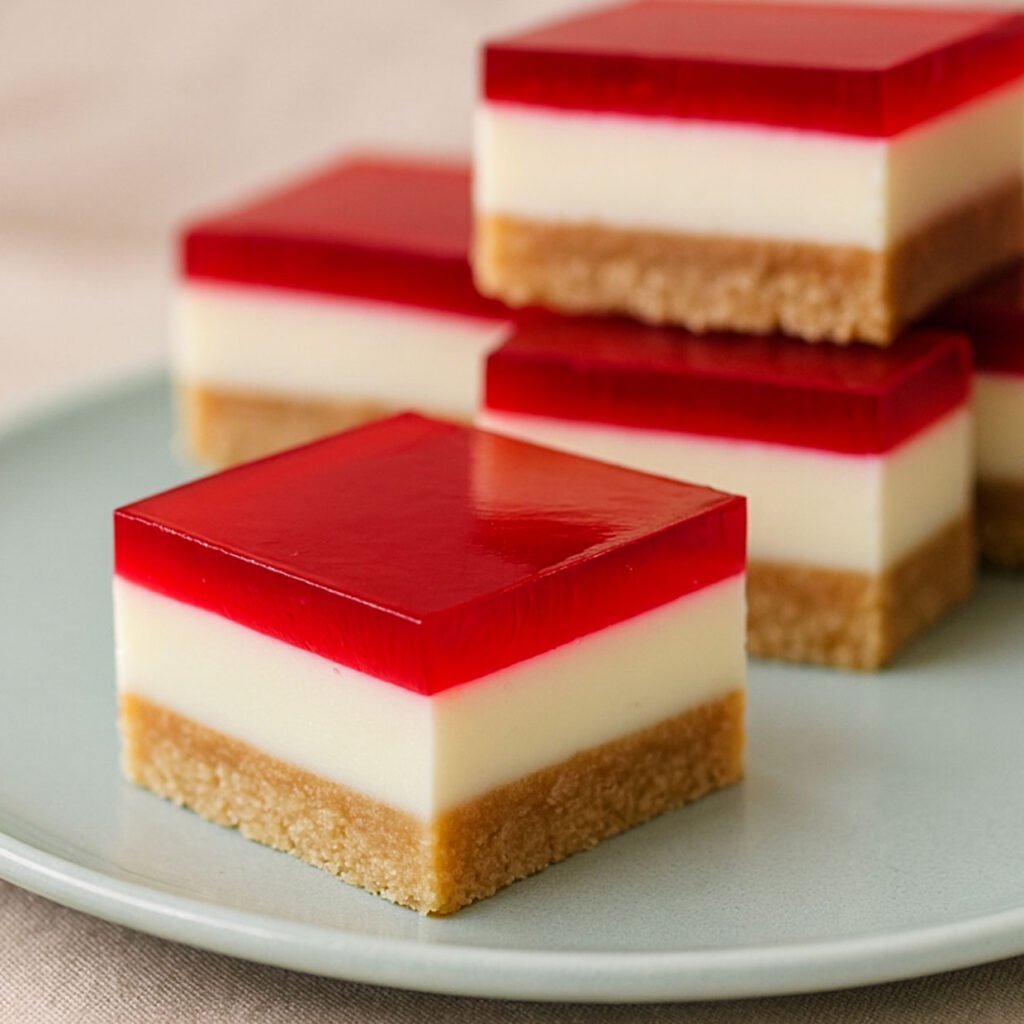
Table of Contents
How to stop the jelly leaking into the cream
Three simple rules fix almost every jelly slice problem:
- Cool the jelly first. Let it cool at room temperature, then chill it until it’s just syrupy, like thin cream. Hot jelly melts the cream layer.
- Make sure the cream is set. A light touch should leave only a faint mark. Short on time? Put the tin in the freezer for 10 minutes.
- Rough up the surface. Gently drag a fork over the cream layer. It helps the jelly grip instead of sliding to the edges.
Jelly slice ingredients
- Plain sweet biscuits: Marie, Nice or Scotch Finger work well.
- Butter and coconut: hold the base together.
- Cream cheese and condensed milk: make the creamy middle. Use cream cheese at room temperature so it beats smooth.
- Lemon juice and gelatine: help the middle set and add a fresh tang. Gelatine is what makes it set firm.
- Jelly crystals: any 85 g packet. Use a little less water than the packet says for a firmer top.
Jelly Slice Recipe
Course: DessertCuisine: AustralianDifficulty: Easy18
servings25
minutes5
minutes300
kcalA classic Aussie jelly slice with a biscuit and coconut base, a smooth lemon cream middle and a bright jelly top. No baking needed.
Ingredients
- Base
300 g plain sweet biscuits, crushed to fine crumbs
90 g unsalted or lightly salted butter, melted
40 g desiccated coconut
1 tbsp caster sugar, optional for extra crunch
Pinch of fine salt
- Cream layer
250 g cream cheese, room temperature
395 g sweetened condensed milk, 1 standard tin
80 ml fresh lemon juice, about 1 large lemon
2 tsp vanilla extract
6 g powdered gelatine, 2 tsp
50 ml cold water to bloom gelatine
Zest of half a lemon, very fine
- Jelly layer
1 packet jelly crystals, 85 g, any flavour
250 ml boiling water
150 ml cold water
- Optional finishes
Extra desiccated coconut to sprinkle
Fresh berries to serve
Directions
- Prepare the tin
- Line a 20 × 30 cm slice tin with baking paper. Let the paper overhang on the long sides so you can lift the slab out. Place the tin in the fridge to chill while you make the base.
- Make the base
- Mix biscuit crumbs, coconut, sugar and a pinch of salt in a bowl. Pour in melted butter. Stir until the mixture looks like damp sand and holds together when squeezed. Tip into the cold tin. Use your fingers to distribute the crumbs, then press very firmly with a flat-bottomed cup. Pack the edges well. Chill for 20 minutes.
- Bloom the gelatine
- Place 50 ml cold water in a small heatproof jug. Sprinkle the gelatine evenly over the surface. Leave for 5 minutes to bloom. It will look spongy.
- Dissolve the gelatine
- Sit the jug in a small saucepan with a few centimetres of gently simmering water. Heat and stir until the gelatine turns clear. Take off the heat and cool for 5 minutes. It should be warm, not hot.
- Mix the cream layer
- Beat cream cheese in a large bowl until completely smooth. Scrape the bowl. Add condensed milk, lemon juice, vanilla and zest. Beat again until silky. With the mixer running, stream in the warm gelatine mixture and beat until fully combined.
- Set the cream layer
- Pour the mixture over the chilled base. Smooth with an offset spatula. Tap the tin on the bench to remove air bubbles. Chill for 60 to 90 minutes until the surface is set and the centre jiggles only slightly when you nudge the tin.
- Prepare the jelly
- Stir jelly crystals with 250 ml boiling water in a jug until dissolved. Add 150 ml cold water and stir again. Let it cool at room temperature for 30 minutes. Transfer the jug to the fridge and chill, stirring every 10 minutes, until the liquid feels cool and slightly syrupy. You are looking for the viscosity of thin cream. This step usually takes 20 to 30 minutes depending on your fridge.
- Score the surface
- Roughly scrape the set cream layer with a fork to create fine ridges. Do not break through the surface. This helps the jelly grip.
- Pour the jelly
- Slide the tin to the fridge shelf. Pull the shelf halfway out so you do not need to carry a full tin of liquid. Gently pour the syrupy jelly over the back of a spoon held just above the surface. Move slowly to avoid dents or air pockets. Push the shelf back in very gently and chill for 2 to 3 hours until completely firm.
- Slice and serve
- Lift the slab out using the paper. Warm a long sharp knife in hot water, dry it well, and cut straight down in one clean motion. Wipe and warm the knife between cuts. Serve cold with a sprinkle of coconut if you like.
Notes
- Deeper slice: use a 20 × 20 cm tin and 1.5 packets of jelly with 375 ml boiling water and 225 ml cold water.
- Two-tone jelly: set a thin layer of one colour, let it firm, then pour a second colour. Make sure each layer is cool and syrupy before pouring.
- No gelatine: make the middle with thickened cream, mascarpone and lemon juice. It will be softer. Use agar agar for the jelly top, following the packet.
- Gluten free: use gluten free biscuits and check your jelly brand.
- Coconut free: swap the coconut for extra biscuit crumbs.
- Extra tang: add 2 tablespoons passionfruit pulp to the cream layer and use a little less lemon juice.
- Storage: keep covered in the fridge for up to 5 days. Don’t leave it out on a hot day for long.
- Freezing: freeze plain squares between sheets of baking paper for up to 1 month. Thaw in the fridge.
- Transport: chill the whole tray overnight. Carry it in a cooler bag with an ice block underneath.
More jelly slice troubleshooting
- Base crumbles: add 1 extra tablespoon of melted butter and press firmly with a flat-bottomed cup.
- Cloudy jelly: stir until the crystals are fully dissolved before adding cold water.
- Bubbles on top: pour slowly over the back of a spoon. Pop bubbles with a toothpick.
- Messy cuts: dip a long knife in hot water, dry it, and cut straight down. Wipe it between cuts.
Flavour ideas
- Classic: strawberry or raspberry jelly.
- Mango passionfruit: mango jelly on top, 2 tablespoons passionfruit pulp in the cream layer.
- Lime coconut: lime jelly, extra coconut in the base, lime zest in the cream.
- Chocolate base: use chocolate ripple biscuits with raspberry or cherry jelly.
- Christmas: red jelly on top, cut into small squares.
Make ahead and storage
Jelly slice is better made the day before. Keep it covered in the fridge for up to 5 days, and don’t leave it out on a hot day for long.
You can freeze plain squares for up to 1 month. Thaw them in the fridge.
Recipes you might like
Frequently asked questions
How long does jelly slice take to set?
About 1 to 1.5 hours for the cream layer, then 2 to 3 hours for the jelly.
Can I use light cream cheese?
Yes, but the middle will be softer. Full fat works best on warm days.
Can I make jelly slice the day before?
Yes, and it’s even better. Keep it covered in the fridge.
How do I cut neat jelly slice squares?
Chill it fully, then use a hot, dry knife and cut straight down.
Can I make this jelly slice recipe without gelatine?
Yes, but the cream layer will be softer. Use agar agar for the jelly top, following the packet.
This jelly slice recipe looks impressive but it’s really just three easy layers and some fridge time. Make it a day ahead and it’s ready when you are.
See you next time,
Ella x